Commercial Products
Open Source
Performing a DSO Installation
Introduction
This document shows you how to perform a custom installation for clustering the following Terracotta products:
- Enterprise Ehcache Includes Enterprise Ehcache for Hibernate (second-level cache for Hibernate)
- Quartz Scheduler
- Web Sessions
Prerequisites
- JDK 1.5 or higher. See the certified-platforms page for certified JVMs.
- Terracotta 4.3.4 or higher Download the kit and run the installer on the machine that will host the Terracotta server, and on each application server (also called a Terracotta client). The kit contains compatible versions of Ehcache and Quartz.
- If you are using an application server, choose a certified server (see the certified-platforms page).
For guaranteed compatibility, use the JAR files included with the Terracotta kit you are installing. Mixing with older components may cause errors or unexpected behavior. If you are using an Enterprise Edition kit, some JAR files will have "-ee-" as part of their name.
Enterprise Ehcache Users
Ehcache must be installed both for Enterprise Ehcache and Enterprise Ehcache for Hibernate (second-level cache for Hibernate). If you do not have Ehcache installed, a compatible version of Ehcache is available in the Terracotta kit. To install Ehcache, add the following JAR files to your application's classpath (or WEB-INF/lib directory if using a WAR file):
${TERRACOTTA_HOME}/ehcache/lib/ehcache-core-<ehcache-version>.jar
The Ehcache core libraries, where
${TERRACOTTA_HOME}/ehcache/lib/slf4j-api-<slf4j-version>.jarThe SLF4J logging facade allows Ehcache to bind to any supported logger used by your application. Binding JARs for popular logging options are available from the SLF4J project. For convenience, the binding JAR forjava.util.loggingis provided in${TERRACOTTA_HOME}/ehcache(see below).${TERRACOTTA_HOME}/ehcache/lib/slf4j-jdk14-<slf4j-version>.jarAn SLF4J binding JAR for use with the standardjava.util.logging.- You will also need to install Terracotta Integration Modules (TIMs) to allow Ehcache to run clustered. The required TIMs are described later in this procedure.
- Hibernate 3.2.5, 3.2.6, 3.2.7, 3.3.1, or 3.3.2 (Enterprise Ehcache for Hibernate only) If you are clustering Enterprise Ehcache for Hibernate (second-level cache), be sure to use a compatible version of Hibernate in your application. Because sharing of Hibernate regions between different versions of Hibernate is not supported, be sure to use the same version of Hibernate throughout the cluster.
Quartz Scheduler Users
If you do not have Quartz installed, a compatible version of Quartz is available in the Terracotta kit. To install Quartz, add the following JAR file to your application's classpath (or WEB-INF/lib directory if using a WAR file):
${TERRACOTTA_HOME}/quartz/quartz-<quartz-version>.jar- The Quartz core libraries, where <quartz-version> is the version of quartz.
- You will also need to install Terracotta Integration Modules (TIMs) to allow Ehcache to run clustered. The required TIMs are described later in this procedure.
Step 1: Configure the Terracotta Platform
The Terracotta platform is the basis of the Terracotta cluster. You must configure the Terracotta servers and clients that form the cluster using the Terracotta configuration file (tc-config.xml by default). Start with a basic tc-config.xml:
<?xml version="1.0" encoding="UTF-8"?>
<!-- All content copyright Terracotta, Inc., unless otherwise indicated. All rights reserved. -->
<!-- This Terracotta configuration file is intended for use with Terracotta for Hibernate. -->
<tc:tc-config xsi:schemaLocation="http://www.terracotta.org/schema/terracotta-5.xsd"
xmlns:tc="http://www.terracotta.org/config"
xmlns:xsi="http://www.w3.org/2001/XMLSchema-instance">

 <servers>
   <!-- Shows where the Terracotta server can be found. -->
   <server host="localhost">
     <data>%(user.home)/terracotta/server-data</data>
     <logs>%(user.home)/terracotta/server-logs</logs>
   </server>
 </servers>
 <!-- Shows where to put the generated client logs -->
 <clients>
   <logs>%(user.home)/terracotta/client-logs</logs>

 <!-- Names the Terracotta Integration Modules (TIM) needed for clustering specific technologies. -->
   <modules>
     <!-- Add TIMs here using <module name="tim-foo-<foo version>" /> elements. -->
   </modules>
 </clients>
</tc:tc-config>
Save this file to ${TERRACOTTA_HOME}/tc-config.xml on the host with the Terracotta server.
| This procedure assumes you name the Terracotta configuration file `tc-config.xml` and save it to ${TERRACOTTA_HOME}. If you give the file a different name and locate it elsewhere, you must adjust the name and paths shown in this procedure accordingly. |
TIMs for Clustering Enterprise Ehcache
To cluster Enterprise Ehcache or Enterprise Ehcache for Hibernate, add the following element to the <modules> subsection of the <clients> section:
<module name="tim-ehcache-2.0" />
The module shown is for Ehcache 2.0. Note that the version shown at the end of the module name must match the version of Ehcache being used. For example, to integrate with Ehcache 1.7.2, add:
<module name="tim-ehcache-1.7" />
You must use Ehcache version 1.7.2 or higher. The Terracotta kit contains a compatible version of Ehcache and it is recommended that you use that version by adding the provided Ehcache JAR files to your application's classpath.
TIMs for Clustering Quartz Scheduler
To cluster Quartz Scheduler, add the following element to the <modules> subsection of the <clients> section:
<module name="tim-quartz-1.7" />
The module shown is for Quartz 1.7.x. Note that the version shown at the end of the module name must match the version of Quartz being used. You must use Quartz version 1.5.1 or higher. The Terracotta kit contains a compatible version of Quartz and it is recommended that you use that version by adding the provided Quartz JAR file to your application's classpath.
TIMs for Integrating an Application Server
To integrate an application server, add the following element to the <modules> subsection of the <clients> section:
<module name="tim-<app-server>-<app-server-version>" />
For example, to use Tomcat 6.0, add:
<module name="tim-tomcat-6.0"/>
See the following table for a full list of certified application-server TIMs.
| Container | Terracotta Integration Module Name |
|---|---|
| GlassFish v1 | tim-glassfish-v1 |
| GlassFish v2 | tim-glassfish-v2 |
| JBoss Application Server 4.0 | tim-jboss-4.0 |
| JBoss Application Server 4.2 | tim-jboss-4.2 |
| JBoss Application Server 5.1 | tim-jboss-5.1 |
| Jetty 6.1 | tim-jetty-6.1 |
| Tomcat 5.0 | tim-tomcat-5.0 |
| Tomcat 5.5 | tim-tomcat-5.5 |
| Tomcat 6.0 | tim-tomcat-6.0 |
| WebLogic 9 | tim-weblogic-9 |
| WebLogic 10 | tim-weblogic-10 |
To integrate your chosen application server, see the following sections.
Tomcat, JBoss Application Server, Jetty, WebLogic
Integrate Terracotta by adding the following to the top of the appropriate startup script for the chosen container, or to a configuration file used by the startup script:
UNIX/Linux
TC_INSTALL_DIR=path/to/local/terracotta_home
TC_CONFIG_PATH=path/to/tc-config.xml
. ${TC_INSTALL_DIR}/platform/bin/dso-env.sh -q
export JAVA_OPTS="$JAVA_OPTS $TC_JAVA_OPTS"
Microsoft Windows
set TC_INSTALL_DIR=path\to\local\terracotta_home>
set TC_CONFIG_PATH=path\to\local\tc-config.xml
call %TC_INSTALL_DIR%\platform\bin\dso-env.bat -q
set JAVA_OPTS=%JAVA_OPTS% %TC_JAVA_OPTS%
The following table lists suggested container script files to use:
| Your container may use JAVA_OPTIONS instead of JAVA_OPTS. |
| For This Container | Add Terracotta Configuration to this File | Notes |
|---|---|---|
| JBoss Application Server | `run.conf` | `run.conf` is called by both `run.sh` and `run.bat`. |
| Jetty | `jetty.sh` | Jetty can be configured in a number of different ways. See the comments in the `jetty.sh` startup script for more information on how to set the Jetty environment. |
| Tomcat | `setenv.sh` or `setenv.bat` | The setenv script is called by `catalina.sh` or `catalina.bat` if it is exists in the same directory. |
| WebLogic | `setEnv.sh` or `setEnv.bat` | The setEnv script is called by `startWeblogic.sh` or `startWeblogic.bat`. See the startWeblogic script to find or edit the location of the setEnv script. |
GlassFish
GlassFish uses a multi-step process for starting the application server instances. To ensure that Terracotta runs in the same JVM as the application server, add these startup flags to the GlassFish domain.xml (found under the domains/<your_domain>/config directory):
<jvm-options>-Dcom.sun.enterprise.server.ss.ASQuickStartup=false</jvm-options>
<jvm-options>-Dtc.config=<path/to/Terracotta_configuration_file></jvm-options>
<jvm-options>-Dtc.install-root=<path/to/Terracotta_home></jvm-options>
<jvm-options>-Xbootclasspath/p:<path/to/DSO_boot_jar></jvm-options>
The last JVM option contains a boot-jar path. Run the following command from ${TERRACOTTA_HOME} on one of the application servers to find the boot-jar path:
UNIX/Linux
[PROMPT] platform/bin/make-boot-jar.sh
Microsoft Windows
[PROMPT] platform\bin\make-boot-jar.bat
You should see output similar to the following (shown for Linux):
2009-06-24 09:43:54,961 INFO - Configuration loaded from the file at '/Users/local/terracotta-3.0.0/tc-config.xml'.
    Creating boot JAR at '/Users/local/terracotta-3.0.0/platform/bin/../lib/dso-boot/dso-boot-hotspot_linux_150_16.jar...
    Successfully created boot JAR file at '/Users/local/terracotta-3.0.0/platform/bin/../lib/dso-boot/dso-boot-hotspot_linux_150_16.jar'.
Note the relative path given, which in this example is /Users/local/terracotta-3.0.0/platform/bin/../lib/dso-boot/dso-boot-hotspot_linux_150_16.jar. The inferred path, /Users/local/terracotta-3.0.0/lib/dso-boot/dso-boot-hotspot_linux_150_16.jar is needed for the value of the domain.xml element <jvm-options>-Xbootclasspath/p:<path/to/DSO_boot_jar></jvm-options>.
| `domain.xml` uses <jvm-options> elements to pass the required flags. You can add other startup flags, such as `-Dcom.tc.session.cookie.domain`, to `domain.xml`. |
If the setup on your application servers is the same, you can use the path output from one application server to configure the others. However, If the setup on your application servers varies, you may have to run make-boot-jar on each application server to find the appropriate path.
For example, an installation on Linux where clients received their configuration from a server could use startup flags similar to the following:
<jvm-options>-Dcom.sun.enterprise.server.ss.ASQuickStartup=false</jvm-options>
<jvm-options>-Dtc.config=server1:9510</jvm-options>
<jvm-options>-Dtc.install-root=/myHome/tc3.0</jvm-options>
<jvm-options>-Xbootclasspath/p:/myHome/tc3.0/lib/dso-boot/dso-boot-hotspot_linux_160_06.jar</jvm-options>
Clustering a Web Application with Terracotta Web Sessions
To cluster a web application, you must add the following <web-applications> subsection to the <application> section of tc-config.xml:
<!-- The application section is at the same level as the servers and clients sections. -->
<application>
...
 <web-applications>
   <web-application>myWebApp</web-application>
 </web-applications>
...
</application>
The value of <web-application> is the application context root or the name of the application’s WAR file.
Step 2: Configure Terracotta Products
The following sections show you how to configure the following Terracotta products:
- Enterprise Ehcache Configuration
- Enterprise Ehcache for Hibernate Configuration
- Quartz Scheduler Configuration
- Web Sessions Configuration
Enterprise Ehcache Configuration
Each instance of the distributed cache must have an Ehcache configuration file. The Ehcache configuration file, ehcache.xml by default, should be on your application's classpath. If you are using a WAR file, add the Ehcache configuration file to WEB-INF/classes or to a JAR file that is included in WEB-INF/lib.
| Terracotta Distributed Ehcache for Hibernate also uses `ehcache.xml`. |
Sample Ehcache Configuration File
The Ehcache configuration file configures the caches that you want to cluster. The following is a sample ehcache.xml file:
<ehcache xsi:noNamespaceSchemaLocation="ehcache.xsd" name="myCacheMan">
 <defaultCache maxElementsInMemory="10000" eternal="false"
     timeToIdleSeconds="120" timeToLiveSeconds="120" overflowToDisk="true"
     diskSpoolBufferSizeMB="30" maxElementsOnDisk="10000000"
     diskPersistent="false" diskExpiryThreadIntervalSeconds="120"
     memoryStoreEvictionPolicy="LRU"/>
 <cache name="foo" maxElementsInMemory="1000"
      maxElementsOnDisk="10000" eternal="false" timeToIdleSeconds="3600"
      timeToLiveSeconds="0" memoryStoreEvictionPolicy="LFU">
 <!-- Adding the element <terracotta /> turns on Terracotta clustering for the cache "foo". -->
   <terracotta clustered="true" valueMode="identity"/>
 </cache>
</ehcache>
| The <terracotta> element's `valueMode` attribute sets the cache mode to serialization or identity. Before choosing a cache mode, be sure to understand the functions, effects, and requirements of serialization and identity modes. See Comparing Serialization and Identity Modes for more information. |
Using the Cache in Your Application
In your application, the distributed cache is set up by creating the CacheManager, which references the Ehcache configuration file. There are a number of ways to have your application locate the Ehcache configuration file, some of which have been noted above.
The following example code shows how to use the cache configured in the ehcache.xml file shown above:
import net.sf.ehcache.CacheManager;
import net.sf.ehcache.Cache;
import net.sf.ehcache.Element;
// Look up cache manager and cache. This assumes that the app can find the
// Ehcache configuration file. Note that "foo" in getEhcache() corresponds to
// name given to a cache block in the Ehcache configuration file.
CacheManager cacheManager = new CacheManager();
Cache cache = cacheManager.getEhcache("foo");
// Put element in cache
cache.put(new Element("key", "value"));
// Get element from cache
Element element = cache.get("key");
As an option to using the Ehcache configuration file, you can also create the cache programmatically:
    public Cache(String name,
                 int maxElementsInMemory,
                 MemoryStoreEvictionPolicy memoryStoreEvictionPolicy,
                 boolean eternal,
                 long timeToLiveSeconds,
                 long timeToIdleSeconds,
                 int maxElementsOnDisk,
                 boolean isTerracottaClustered,
                 String terracotta ValueMode)
For more information on the Ehcache configuration file, instantiating the CacheManager, and programmatic approaches see the Ehcache documentation.
Incompatible Configuration
Do not use the element <terracottaConfig> in ehcache.xml.
For any clustered cache, you cannot use configuration elements that are incompatible when clustering with Terracotta. Clustered caches have a <terracotta> element.
The following Ehcache configuration attributes or elements should not be used in clustered caches:
- DiskStore-related attributes
overflowToDisk,overflowToOffHeap, anddiskPersistent. The Terracotta server automatically provides a disk store. - Replication-related configuration elements, such as <cacheManagerPeerProviderFactory>, <cacheManagerPeerListenerFactory>, <bootstrapCacheLoaderFactory>, <cacheEventListenerFactory>. When a change occurs in a Terracotta cluster, all nodes that have the changed element or object are automatically updated. Unlike the replication methods used to cluster Ehcache, cache event listeners are not (and do not need to be) notified of remote changes. Listeners are still aware of local changes.
- Replication-related attributes such as
replicateAsynchronouslyandreplicatePuts.
If you use the attribute MemoryStoreEvictionPolicy, it must be set to either LFU or LRU. Setting MemoryStoreEvictionPolicy to FIFO causes the error IllegalArgumentException.
Enterprise Ehcache for Hibernate Configuration
Each instance of the distributed second-level cache for Hibernate must have an Ehcache configuration file. The Ehcache configuration file, ehcache.xml by default, should be on your application's classpath. If you are using a WAR file, add the Ehcache configuration file to WEB-INF/classes or to a JAR file that is included in WEB-INF/lib.
| Terracotta Distributed Ehcache also uses `ehcache.xml`. |
See Incompatible Configuration for configuration elements that must be avoided.
Sample Ehcache Configuration File
Create a basic Ehcache configuration file, ehcache.xml by default:
<?xml version="1.0" encoding="UTF-8"?>
<ehcache name="myCache"
xmlns:xsi="http://www.w3.org/2001/XMLSchema-instance"
xsi:noNamespaceSchemaLocation="ehcache.xsd">
   <defaultCache
           maxElementsInMemory="0"
           eternal="false"
           timeToIdleSeconds="1200"
           timeToLiveSeconds="1200">
             <terracotta />
 </defaultCache>
</ehcache>
This defaultCache configuration includes Terracotta clustering. The Terracotta client must load the configuration from a file or a Terracotta server.
| In a Terracotta cluster, the application server is also known as the client. |
The source of the Terracotta client configuration is specified in the application server (see TIMs for Integrating an Application Server). It can also be specified on the command line when the application is started using the tc.Config property. For example:
-Dtc.Config=localhost:9510
Cache-Specific Configuration
Using an Ehcache configuration file with only a defaultCache configuration means that every cached Hibernate entity is cached with the settings of that defaultCache. You can create specific cache configurations for Hibernate entities using <cache> elements.
For example, add the following <cache> block to ehcache.xml to cache a Hibernate entity that has been configured for caching (see Step 3: Prepare Your Application for Caching):
<cache name="com.my.package.Foo" maxElementsInMemory="1000"
      maxElementsOnDisk="10000" eternal="false" timeToIdleSeconds="3600"
      timeToLiveSeconds="0" memoryStoreEvictionPolicy="LFU">
 <!-- Adding the element <terracotta /> turns on Terracotta clustering for the cache Foo. -->
 <terracotta />
</cache>
You can edit the eviction settings in the defaultCache and any other caches that you configure in ehcache.xml to better fit your application's requirements.
Enabling Second-Level Cache in Hibernate
You must also enable the second-level cache and specify the provider in the Hibernate configuration. For more information, see Hibernate Configuration File.
Quartz Scheduler Configuration
Quartz is configured programmatically or by a Quartz configuration file (quartz.properties by default). If no configuration is provided, a default configuration is loaded. The following shows the contents of the default configuration file:
# Default Properties file for use by StdSchedulerFactory
# to create a Quartz Scheduler Instance, if a different
# properties file is not explicitly specified.
#

org.quartz.scheduler.instanceName = DefaultQuartzScheduler
org.quartz.scheduler.rmi.export = false
org.quartz.scheduler.rmi.proxy = false
org.quartz.scheduler.wrapJobExecutionInUserTransaction = false

org.quartz.threadPool.class = org.quartz.simpl.SimpleThreadPool
org.quartz.threadPool.threadCount = 10
org.quartz.threadPool.threadPriority = 5
org.quartz.threadPool.threadsInheritContextClassLoaderOfInitializingThread = true

org.quartz.jobStore.misfireThreshold = 60000

org.quartz.jobStore.class = org.quartz.simpl.RAMJobStore
To cluster with Terracotta, you must edit the property org.quartz.jobStore.class to specify the Terracotta Job Store for Quartz instead of org.quartz.simpl.RAMJobStore:
org.quartz.jobStore.class = org.terracotta.quartz.TerracottaJobStore
The Quartz configuration file must be on your application's classpath. If you are using a WAR file, add the Quartz configuration file to WEB-INF/classes or to a JAR file that is included in WEB-INF/lib. For more information on configuring Quartz, including use of the Quartz API, see the Quartz documentation at http://www.quartz-scheduler.org.
Web Sessions Configuration
Clustered sessions are configured from tc-config.xml. For more on the <web-applications> section of tc-config.xml, see the Terracotta Configuration Guide and Reference.
Step 3: Install the TIMs
The TIMs specified in tc-config.xml must be installed on each Terracotta client. If you are using Ehcache or Quartz, TIMs associated with Ehcache or Quartz must be added to your application's classpath.
Install the TIM JAR files using the following command:
Unix/linux
${TERRACOTTA_HOME}/bin/tim-get.sh install-for path/to/tc-config.xml
MICROSOFT WINDOWS
${TERRACOTTA_HOME}\bin\tim-get.bat install-for path\to\tc-config.xml
Be sure to target the Terracotta configuration file you modified with the TIM <module> elements. tim-get will print a status for each TIM it attempts to install as well as all dependencies.
For example, if you added TIMs for Ehcache 2.0.0 and Tomcat 6.0, output similar to the following should appear:
Parsing module: tim-ehcache-2.0:latest
Parsing module: tim-tomcat-6.0:latest
Installing tim-ehcache-2.0 1.5.1 and dependencies...
  INSTALLED: tim-ehcache-2.0 1.5.1 - Ok
  INSTALLED: terracotta-toolkit-1.0 1.0.0 - Ok
  INSTALLED: tim-ehcache-2.0-hibernate-ui 1.5.1 - Ok
Installing tim-tomcat-6.0 2.1.1 and dependencies...
  INSTALLED: tim-tomcat-6.0 2.1.1 - Ok
  INSTALLED: tim-tomcat-5.5 2.1.1 - Ok
  INSTALLED: tim-tomcat-common 2.1.1 - Ok
  SKIPPED: tim-session-common 2.1.1 - Already installed
  SKIPPED: terracotta-toolkit-1.0 1.0.0 - Already installed

Done.
Of the TIMs shown for the Ehcache 2.0 portion of the tim-get output, the following must be added to your application's classpath:
- tim-ehcache-2.0
- terracotta-toolkit-<API version> or terracotta-toolkit-<API version>-ee
For Quartz Scheduler, the TIMs that must be added to the application's classpath are:
- tim-quartz-<version>
- terracotta-toolkit-<API version> or terracotta-toolkit-<API version>-ee
where <version> is the version of Quartz Scheduler.
If you are clustering sessions, there is no explicit requirement for placing container or sessions-related TIMs on the classpath.
If you install both open-source TIMs and Enterprise Edition TIMs, then you must specify both types of Terracotta Toolkit JARs in the Terracotta configuration file. For example, if you want to install tim-tomcat-6.0 and tim-ehcache-2.x-ee, then specify the following:
<modules>
 <module group-id="org.terracotta.toolkit" name="terracotta-toolkit-1.2" />
 <module group-id="org.terracotta.toolkit" name="terracotta-toolkit-1.2-ee" />
 <module name="tim-tomcat-6.0" />
 <module name="tim-ehcache-2.x-ee" />
<!-- Other TIMs here. -->
</modules>
The Terracotta Toolkit API version available for your Terracotta kit may be different than the one shown in this example.
Location of TIMs
Generally, TIMs are found on the following path:
${TERRACOTTA_HOME}/platform/modules/org/terracotta/modules/tim-<name>-<version>/<TIM-version>/tim-<name>-<version>-<TIM-version>.jar
where <name> is the name of the technology being integrated, and <version> is the version of that technology (if applicable). For example, the path to the TIM for Ehcache 2.0, which in this example has the TIM version 1.5.1, is as shown:
${TERRACOTTA_HOME}/platform/modules/org/terracotta/modules/tim-ehcache-2.0/1.5.1/tim-ehcache-2.0-1.5.1.jar
The Terracotta Toolkit (terracotta-toolkit) is found in:
${TERRACOTTA_HOME}/platform/modules/org/terracotta/toolkit/terracotta-toolkit-1.0/1.0.0/terracotta-toolkit-1.0-1.0.0.jar
Step 4: Start the Cluster
Start the Terracotta server:
UNIX/Linux
[PROMPT] ${TERRACOTTA_HOME}/bin/start-tc-server.sh &Microsoft Windows
[PROMPT] ${TERRACOTTA_HOME}\bin\start-tc-server.bat- Start the application servers.
Start the Terracotta Developer Console:
UNIX/Linux
[PROMPT] ${TERRACOTTA_HOME}/bin/dev-console.sh &Microsoft Windows
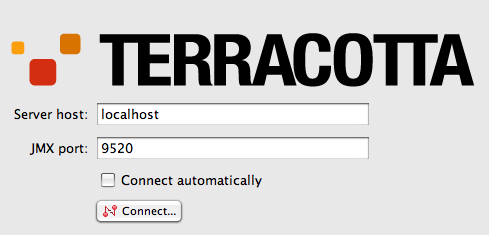
[PROMPT] ${TERRACOTTA_HOME}\bin\dev-console.bat- Connect to the Terracotta cluster.
Click Connect... in the Terracotta Developer Console.
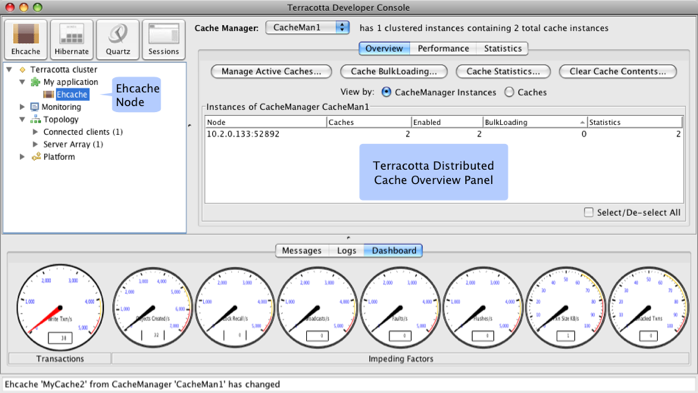
- Click the Topology node in the cluster navigation window to see the Terracotta servers and clients (application servers) in the Terracotta cluster.
- If you are clustering Ehcache or Ehcache for Hibernate, click the My Application node in the cluster navigation window to see panels for these products.
For example, if you are clustering Ehcache, click the Ehcache node in the cluster navigation window to see the caches in the Terracotta cluster.
Quartz Scheduler Where DSO Installation
Quartz Scheduler Where is an Enterprise feature that allows jobs and triggers to be run on specified Terracotta clients instead of randomly chosen ones. For more information on the Quartz Scheduler Where locality API, see Quartz Scheduler Where (Locality API).
DSO users must install tim-quartz-2.0-ee. First, add the TIM to your Terracotta configuration file (tc-config.xml by default):
...
<clients>
 ...
 <modules>
   <module name="tim-quartz-2.0-ee" />
   ...
 </modules>
 ...
</clients>
...
To install the TIMs declared in the Terracotta configuration file, use the following command:
UNIX/Linux
${TERRACOTTA_HOME}/bin/tim-get.sh install-for /path/to/tc-config.xml
Use tim-get.bat with Microsoft Windows.